Serves: Makes 96
Approx cost: €1.50
Approx calories (per Skorpa): ~45
Approx preparation time and cooking time: 5 hours
Firstly, I’d like to remind any readers who haven’t already that my giveaway will end on the 5th of September. If you an opportunity of getting a really great, personalised kitchen knife and haven’t already commented then just go here!
Skorpor, skorpor, skorpor – What should I call thee! I had great difficulties coming up with the correct name for this post. My instinct told me to call them “Krisprolls”, but in fact they’re not. These are Krisprolls, and while similar, Krisprolls is a trademark of Pågen, a Swedish bakery company so that was out. Ok, I thought, I’ll have a search on Wikipedia to see the Swedish article on Skorpor, and then just see what the name of the English article is. What do I find? Rusks. Seriously? Aren’t those things that babies eat? Swedish rusks really doesn’t sound very appetising now, does it, so a bit of further reading showed me that rusks are sometimes called biscotti (a ha! Now we’re getting somewhere). Biscotti sounds significantly better than rusk, I have to say, so “Swedish Biscotti” it is today 🙂
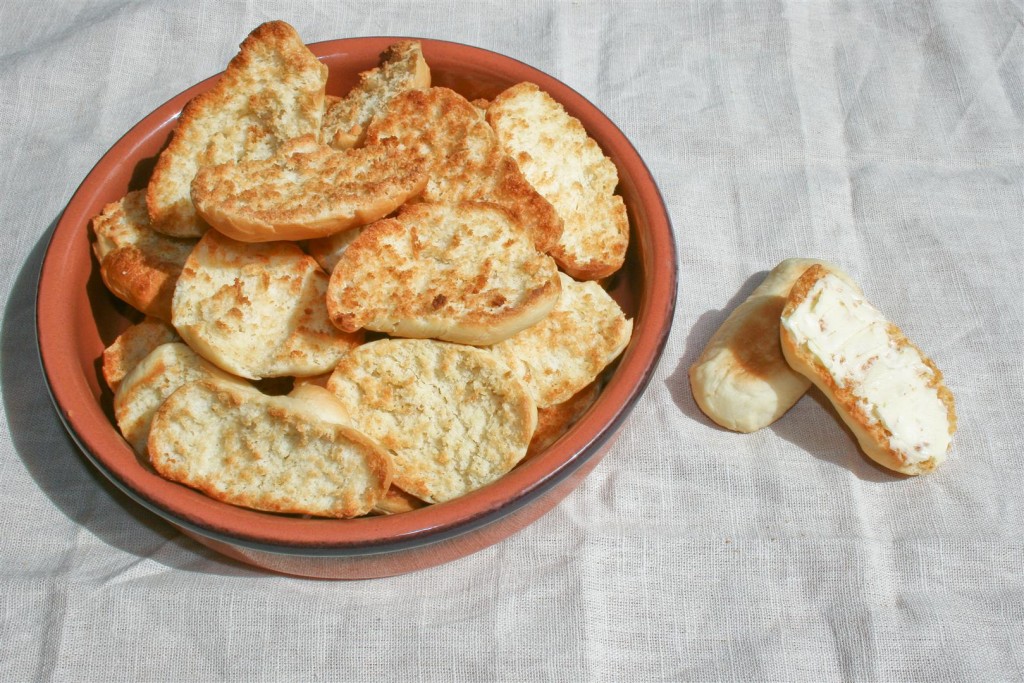
So what are these things, for anyone who wasn’t lucky enough to have ever had one? Well, skorpor (or skorpa, singular) are like small bread-rolls, pushed apart with a fork, grilled and then baked until hard. Kind of like a giant crouton, but so, so delicious. Eat with butter, with cheese, just about any way you please. The baking process is a little time consuming but the satisfaction of making your own giant batch of these things is enormously satisfying. This is my first attempt, hence they’re not the prettiest of things but with a bit more practise I’ll be churning out awesome skorpor in no time! (By the way, they make awesome breakfasts!). Have a good Monday everyone 🙂
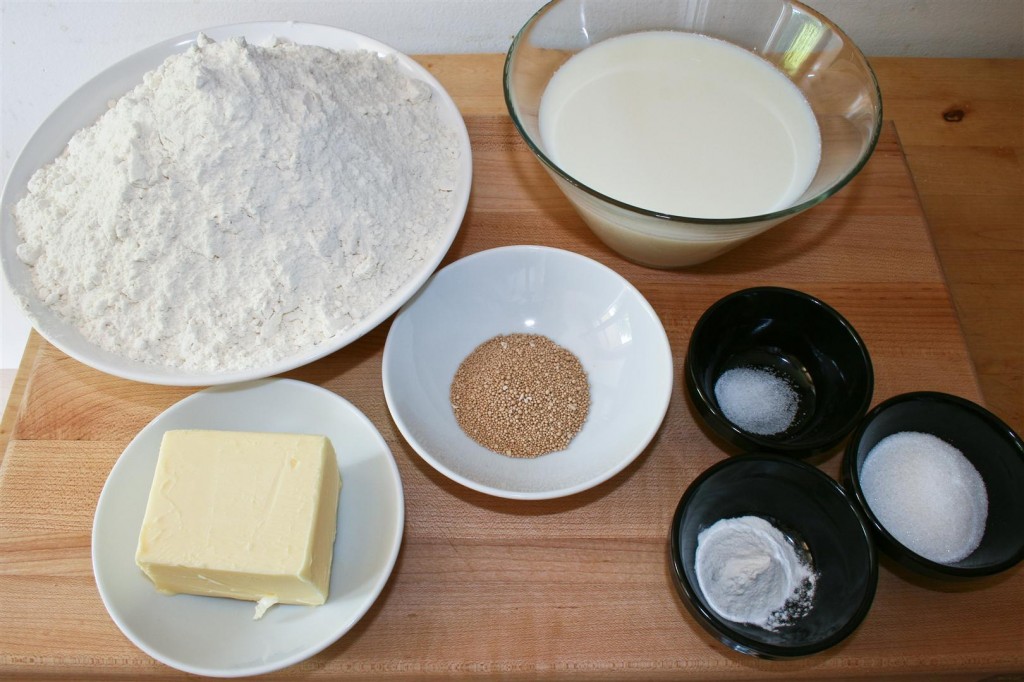
Ingredients
– 800g Plain Flour
– 125g Butter
– 500 ml Milk
– ~15g dried Yeast
– 1tsp Salt
– 3tbsp Sugar
– 1 tsp Baking Powder
Instructions
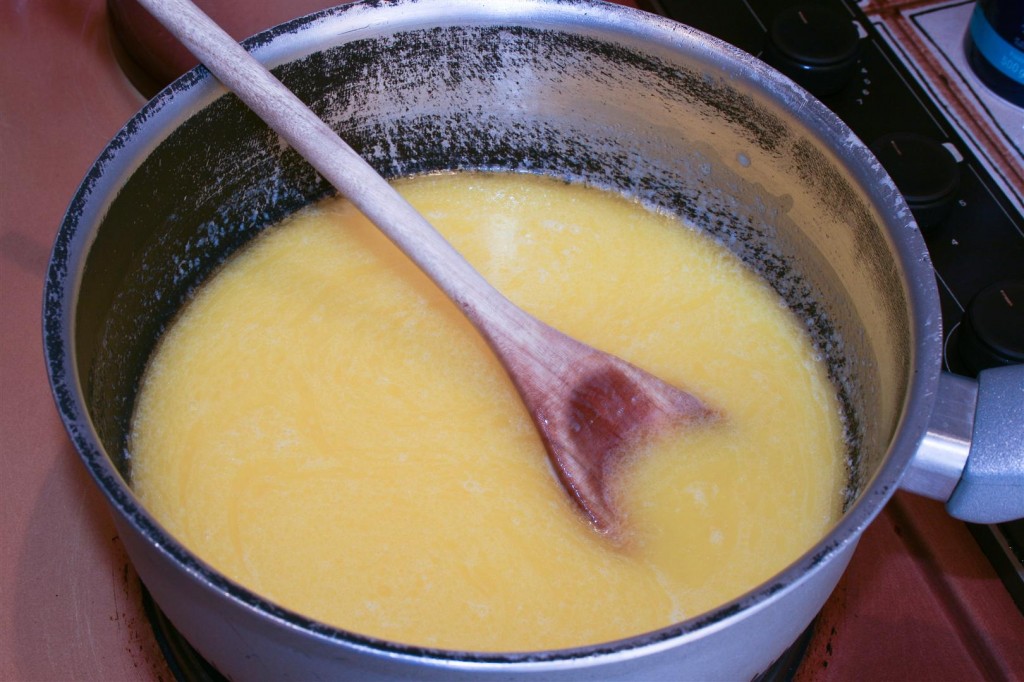
- Start by melting the butter in a pan. Once melted down, add in the milk and the sugar and continue to heat, stirring to dissolve the sugar, until warm, but not hot, when you dip your finger in. Remove from the heat.
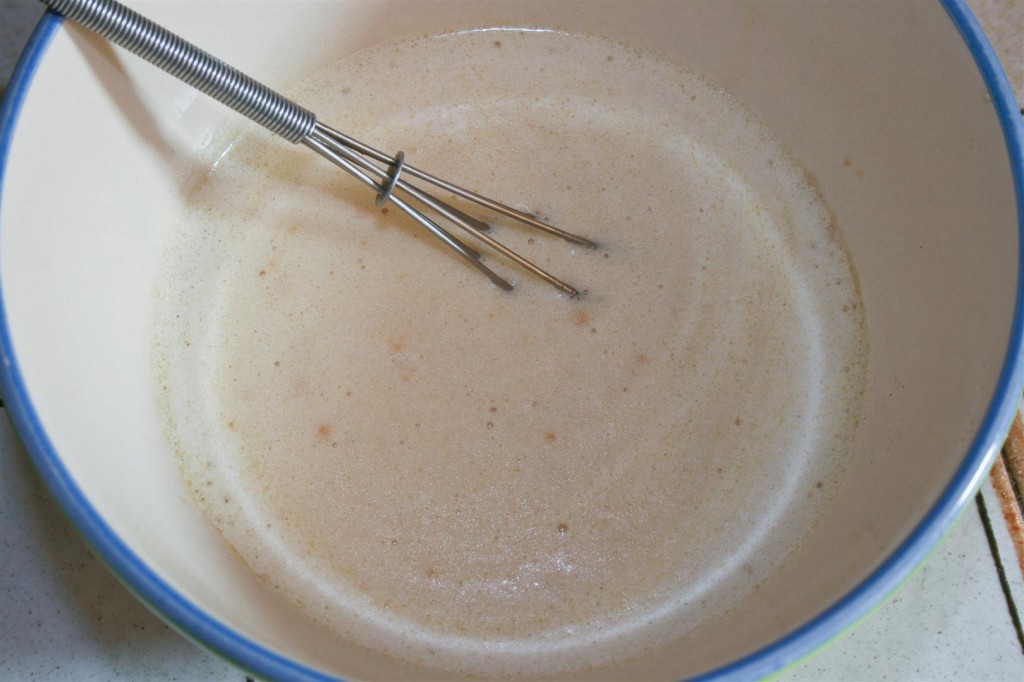
- Place the yeast into a small bowl and transfer 4 or 5 tbsps of the milk mixture to the bowl, whisking lightly to mix in. Be sure to actually get milk, and not just butter (which will float on the surface of the milk) from the pan. Set aside the yeast bowl for 10 minutes or so to allow the yeast to activate, before whisking again to ensure all lumps are broken up, before leaving for another 5 minutes or so. It should be foaming nicely on the top after this time.

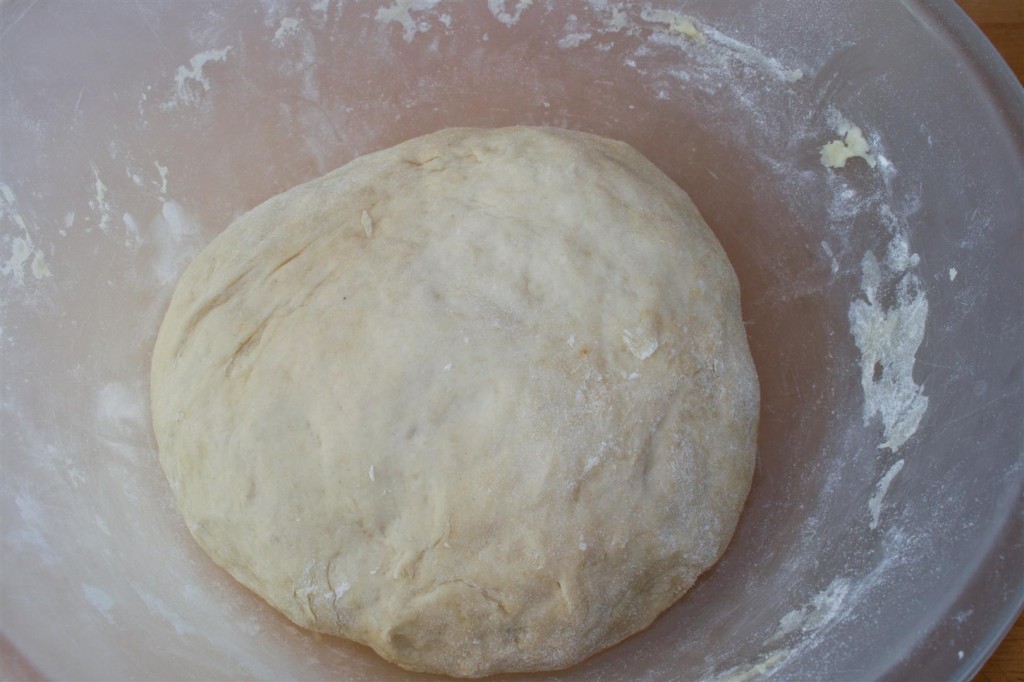
- Mix the Flour, Salt and Baking Powder in a large bowl. Transfer the Yeast mixture back to the pan with the rest of the Milk and Butter. Mix well and then pour the contents of the pan into the flour. Mix well with a wooden spoon and when it starts to form a dough get stuck in with your hands, kneading in any left-over flour. Add a little extra flour or milk as needed to create a manageable, non-sticky dough, before turning onto a floured surface and kneading well for around 10 minutes. Form into a ball and place in the bottom of the bowl and cover with a clean cloth. Leave in a warm place for about 45 minutes, by which time the dough will have approximately doubled in size.

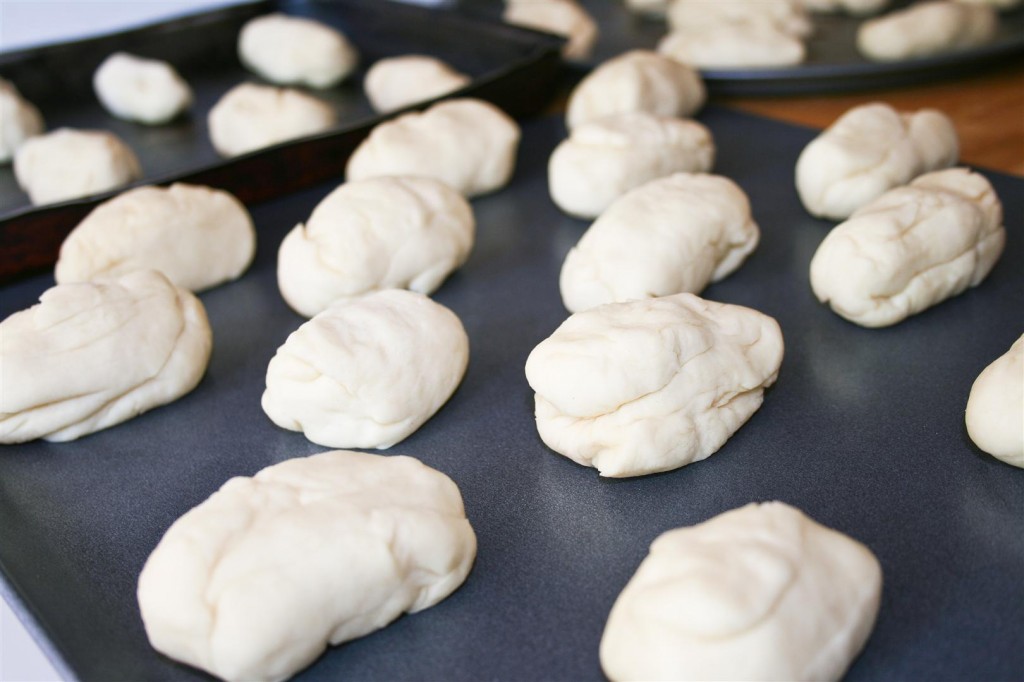
- Remove the dough and push it down. Form into a sausage shape and cut in half. Cut each half into 24 equally sized pieces. I do this by cutting the half piece into half again and then cutting each new half into three, and then each third into four. Once you have your 48 pieces of dough, form each one into a rough sausage shape, hopefully making them look a bit tidier than mine below, and place them on a baking sheet, allowing space in between each one for air movement and spreading! Cover again and leave for about 30 minutes to rise, and meanwhile preheat the oven to ~200 degrees Celsius.

- After the dough has risen again, place the baking trays into the oven at bake for 8-10 minutes, until starting to turn golden brown. Remove from the oven and allow to sool slightly on a wire rack.

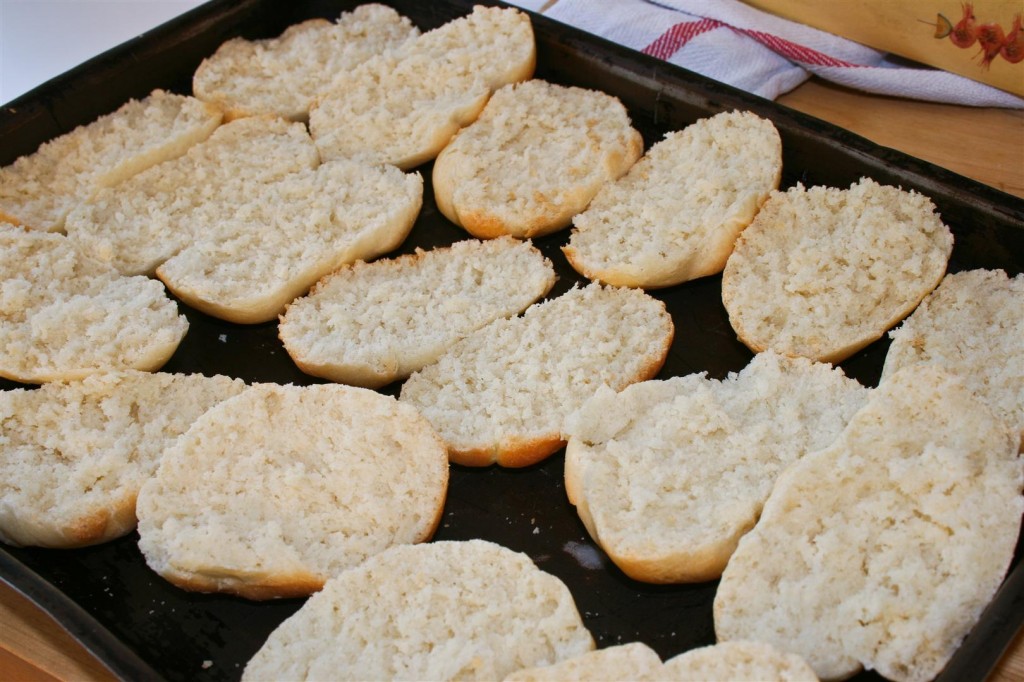
- Take a fork and run it through the small bread-rolls, all along their lengths, to create a rough “cut”, before gently prying the rolls apart. Place them soft side up on a tray and place under a hot grill/broiler and toast the tops lightly, until starting to turn golden brown. Once all the rolls have had their insides toasted, place them all onto a large baking tray (or several) and place into the oven.

- Bake at around 80 degrees Celsius for about 3 hours, checking them periodically to ensure they’re not too brown. You can check if they’re done by squeezing the bottoms of a few of them. When done they should feel crisp and have no give when squeezed. Remove from the oven and allow to cool before storing. Enjoy!


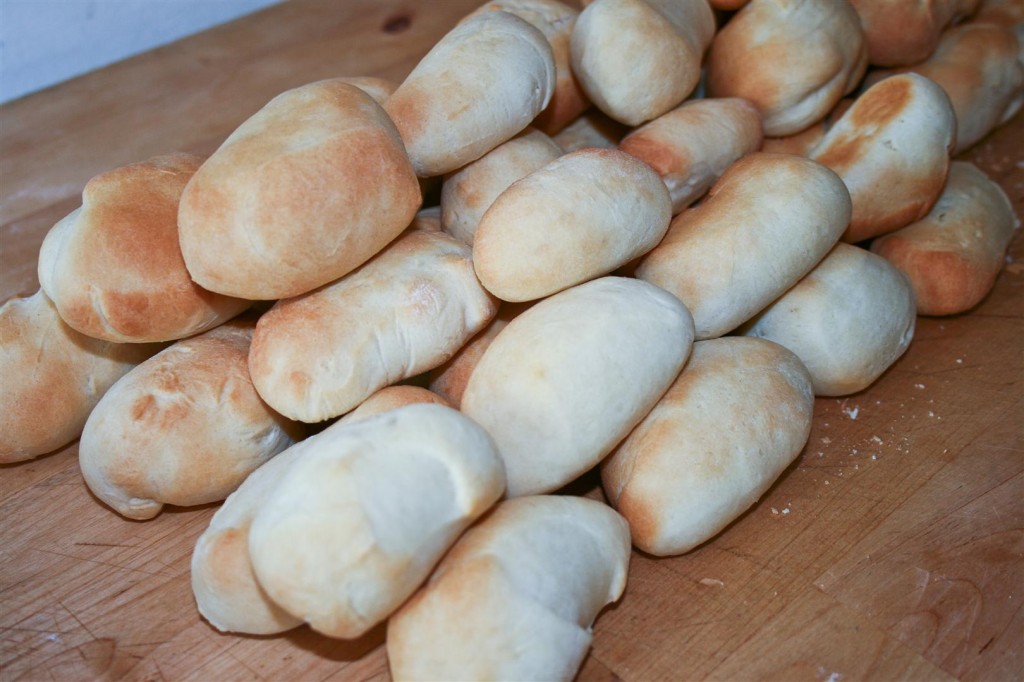
Your out of the oven rolls look bakery gorgeous Charles – perfect sizing and colouring, and very neat that they are baked again giving them that biscotti'ish look and feel. I'm not letting you off the hook yet though for traditional biscotti 🙂
Cheers Kelly – nope, don't worry, Biscotti is still on the list of things to do, absolutely! I'm quite looking forward to making that actually 🙂 Hope you're having a great day 🙂
Not pretty? Are you kidding? These look gorgeous!!!! I am so impressed that this was your first attempt. Mine would look a lot less appealing. Bread and I are still figuring out a way to work together. I could dive right in this bowel right now and probably eat the entire contents. I'm now feeling the need to go get some carbs. Yum!
Haha, thanks Kristy, although my wife thought they were hilariously ugly (but then she's grown up with her mother making them and being probably quite accomplished). As for bread… I've started only having bread in the house that I've made myself now. Each sunday I take a couple of hours to bash out a couple of loaves for the week and I'll tell you – I don't know whether I've just managed to hit that "sweet spot" or whether I've actually got some bread-making skills now, but the bread I'm making is really great… I'm so pleased with it right now. I've made a lot of bread in my life and it's always been… well, a little dry, or a little yeasty, or too crumbly etc but this is just… incredible. I wonder if it's worth making *another* bread post… yeah, maybe I will 😀
Maybe it has to do with the fact I've never seen a skorpor before, but I do think they look scrumptious. In fact, I had to get some bread for lunch today. Well, you give me hope. I've been making a loaf of sourdough every weekend since I got the starter. For a while they were getting better and better looking. Then this past weekend it went all wrong. Not sure why. I'll keep at it though. I'm gunna get that sweet spot if it takes my whole life! (Plus even if it doesn't look good – it sure tastes darn good!) And definitely do another bread post!!!! I'd love to read it. 🙂
I've been meaning to get a sourdough starter going myself actually. I'm going to be making some white bread this weekend I think – if that goes as well as my most recent attempts I'll definitely have to post it – it was so good!
This looks great, Charles. I bet it would be a wonderful base for tapenade or tomato confit. Yet another winner!
Hi Eva – absolutely, it would be perfect for those I think. I had problems keeping them all in the oven and baking (it's VERY easy to take them out and eat them before they're done) but if you can manage to complete the baking process with most of the batch intact they'd make great little snacks like this!
Charles, you are a fantastic baker! I am sure these skorpor are even more scrumptious than the ones I buy at IKEA (yes, I'm a big connoisseur of IKEA food 😉 ). You shouldn't have written it was your first attempt. I would have never guessed! They look perfect.
Do people eat them soft too? I mean in Sweden? (I have just thought… you could serve them next time with bouillabaisse and rouille!).
Hi Sissi – you're too kind, although my wife thought they looked hilarious 😀 I guess you could eat them soft… the dough recipe is similar to the Cinnamon Swirls recipe I posted a while ago, and of course these are eaten soft. Next time I'll add some crushed cardamom seeds to the dough… I think that will be delicious! Good call on serving them with bouillabaisse and rouille too… didn't think of that at all! 🙂
I've never had the pleasure of indulging in skorpor. What a name! Looks delicious! I don't think they're ugly at all–they're browned to perfection. Mmm a little butter, jam, pesto…really anything sounds like it'd be awesome on the bread!
Thanks Caroline. They often sell them in IKEA, in case you live near one at all. The best ones are "Kardamumma Skorpor", or Cardamom "Biscotti"… and they're just wonderful. Definitely buy a bag if you have a chance too, and yep – butter, jam, pesto… they'd all top these beautifully I think!
I actually do live in the vicinity of an IKEA, so that works out quite well. 🙂
Another fabulous looking dish that I haven't had. Biscotti is one of my favorites and this looks wonderful.
Thanks Greg – You should have a try at making them. I'm sure your first attempt would be significantly more successful than my little batch of mis-shapes 😀 Hope you're having a good day 🙂
Im sure those taste great with some buhterbutter
Everything tastes good with buhterbutter! Raw potatoes? No problem, add some buhterbutter!
The pile of browned buns on the wooden cutting board looked wonderful. I guess what you're doing is making a kind of English muffin and then pre-toasting it. 🙂
I love baking bread and applaud your efforts. I just wish there were more people in my house ready to snatch the hot loaves fresh out of the oven and devour them because that's my biggest complaint about home made breads … they get hard so quickly.
I have a 5 lb bag of flour that I just pulled out of my freezer (the last of the 20 kg bag I originally bought) and am torn about what to do with it … pizza, a boule of sun-dried tomato, an herb flecked epi, the dilly-onion bread braid. As soon as I buy a bread machine I'm making a ciabatta cause I can't knead the super moist dough by hand.
Heh, I had no idea you could freeze flour! I just bought a 5kg sack of semolina flour yesterday – looking forward to making some good bread with that but I agree, it can get dry pretty fast. I find the best thing to do is make multiple small loaves and freeze them. Using my regular 1kg bags I make two loaves, but for two people even that is a bit "much" so I might consider upping to 3 loaves.
I think I'm going to try and make some pizza soon. I still didn't use my new pizza stone so that will be something to look forward too, although the dilly-onion bread braid sounds incredible too!
For these – yeah, it's a little bit like that. The dough is almost the same as the dough for Cinnamon Swirls. It bakes very well and is a great dough to work with too!
"Heh, I had no idea you could freeze flour!"
I started doing it with my whole wheat since I was afraid 'things' would get into it if left to sit in my pantry, even if I put the paper bag into a plastic bag or air tight plastic container, until the next time I was going to make something with the flour. Now I do it with the all-purpose too. Just remember to let the flour come to room temperature before you start your cooking. 🙂
I transfer the flour to new freezer bags (5 lbs is about the maximum amount) and double bag for safety.
Of course you know I;m not a bread eater, but this Skorpor may have me reconsidering that fact lol. I have to stop visiting when I'm hungry lol. Very nice recipe
Hehe, thanks Kay! Hope you're having a good day 🙂
i can never bake a good bread and these looks like a Pro. Love the golden brown crust on it.
Hi Kankana – what problems do you encounter when baking bread? I used to always make the bread too yeasty, but now I discovered that it's important to "activate" the yeast first… let it start working by itself before adding to the flour and then it works amazingly!
These look amazing! Seeing other people make rolls/bread makes me want to start doing it again… There is nothing like the smell of fresh breads.
Thanks Crystal, and I totally agree – Fresh bread is just an amazing smell. I've made myself a personal promise to not buy any bread from the store anymore. I set aside a couple of hours each Sunday to make bread and so far it's going well, and the results are promising!
This is the bread I've been talking about. I like to form it into a braid for parties and serve the smaller slices but you can certainly shape it into a regular loaf for family meals.
My Dilly-Onion Bread Braid
1 medium onion, finely chopped
3 – 3 1/2 cups all purpose flour
1 pkt instant yeast
2 tbsp sugar, divided
1/4 cup warm water
1 tsp salt
2 tbsp olive oil
1 tbsp dill seed
1 tbsp dill weed
3/4 cup sour cream
1 egg (2nd egg may be used for brushing top of braid)
Fry onion in olive oil, let cool.
Activate yeast in 1/4 c warm water and 1 tsp sugar. Beat egg into sour cream.
In a large bowl, add 3 1/4 c flour, salt, remainder of sugar, dill seed and dill weed. Stir in cooled onion and oil, activated yeast and egg/sour cream mixture. Knead 5-8 min, adding enough flour to make a loose dough. In an oiled bowl, cover and let rise for 1 hr or til doubled. Cut into 3 pieces, roll into 12-14" strips and braid onto seasoned baking sheet. Or you can sprinkle corn meal onto baking sheet.
Let rise again, covered, til doubled in size. Brush with milk or beaten egg and bake at 350 deg F for 30-40 min or until golden brown and bottom sounds hollow when rapped with knuckle.
Oh, lovely! I can just imagine how amazing that tastes… dill and onion together in bread… mmm, yummy. I don't think I ever saw dill seeds before though… or maybe I just never looked properly. Something to investigate anyway – I can feel like this recipe is calling my name! 😀 Thanks for posting it here 🙂
The dill seed and dill weed both add their own unique flavour characteristics to the bread. And, cooking the onion before adding it to the bread gives it a milder, sweeter flavour. With the richness of the sour cream in the recipe … I think it's a winner all the way around. 🙂
I also make a very tasty bread with diced sun-dried tomatoes, dried basil and garlic (powder is easiest) as a great bowl for a spinach and cream cheese dip. You can of course, just make a couple of baguettes out of it and cut them into big cubes for slathering with the dip. 🙂
Brilliant – ok, so you know I´m going to make these now right?!
Awesome – I hope you roll-shapes turn out a bit prettier than mine. Fork them apart really roughly as well for that really rustic top. Don’t give up on the baking part either – that’s the most annoying part. If you have a lot in a tray they can really take a long time, but they’re worth it!